

Next.js is a popular React framework that uses a file-based routing system, where files and folders automatically map to routes in the application. Nested routes build on this concept by allowing developers to create hierarchical URL structures using subdirectories.
- Creating nested folders inside the app directory.
- Organizing related pages into categories and subcategories.
- Building multi-level routes by nesting directories within other directories.
- Managing structured navigation without relying on external routing libraries.
Steps To Implement
In the App Router, routing is based on the folder structure inside the app directory. Each folder represents a route segment, and a page.js file defines the UI for that route. By nesting folders inside one another, you can create nested routes automatically without any additional routing configuration.
Step 1: Create a new Next.js application using the following commands.
npx create-next-app@latest my-next-app
cd my-next-app
Step 2: Verify the installed dependencies.
The required dependencies are installed automatically when creating the project using create-next-app.
Initial Project Structure:The project structure will look like the following after creating the application. Understanding the project structure is important because Next.js uses file-based routing.
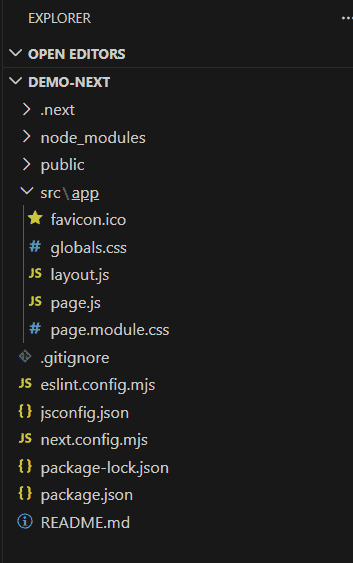
Example:To better understand nested routing in Next.js, let us create a simple GeeksforGeeks website with a home page.
Step 1: Replace the content of the src/app/page.js file with the following code to create the home page.
// Filename - src/app/page.js
export default function Home(){
  return(
      <div>
          <h1 style={{color: "green"}}>
                Geeks for Geeks
          </h1>
          <h1> Geeks for Geeks home page !!! </h1>
      </div>
  );
}
Step 2: Create an articles folder inside the app directory and add a page.js file (http://localhost:3000/articles).
// Filename - src/app/articles/page.js
export default function Articles(){
    return(
        <div>
            <h1 style={{color: "green"}}>
                Geeks for Geeks
            </h1>
            <h1> Articles page of GeeksforGeeks </h1>
        </div>
    );
  }
Now the file structure looks like this.
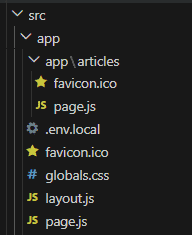
Till this point, regular routing was able to satisfy our needs.
Step 3: Inside the articles folder, create a dsa folder and add a page.js file. This creates the nested route http://localhost:3000/articles/dsa.
// Filename - src/app/articles/dsa/page.js
export default function Articles(){
    return(
        <div>
            <h1 style={{color: "green"}}>
                Geeks for Geeks
            </h1>
            <h1> Articles page of GeeksforGeeks </h1>
        </div>
    );
  }
The file structure after the creation of our first nested route can be seen below.
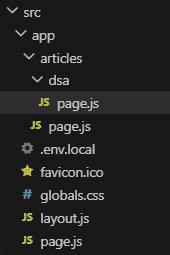
Step 4: Second nested route (http://localhost:3000/articles/dsa/post1)
Now that we have created a sample category, let's add a sample post to it. Create a post1 folder inside the dsa folder and add a page.js file. This automatically creates the route http://localhost:3000/articles/dsa/post1.
// Filename - src/app/articles/dsa/post1/page.js
export default function Post1(){
    return(
        <div>
            <h1 style={{color: "green"}}>
                Geeks for Geeks
            </h1>
            <h1> Sample post of GeeksforGeeks </h1>
        </div>
    );
  }
The file structure will now look like the one shown below.
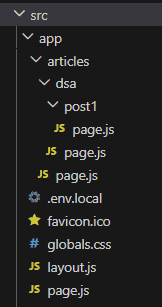
Output:
Steps to run the application: Enter the following command in the terminal to start the development server.
npm run dev