

Next.js API Routes allow you to create server-side endpoints directly within your application. In the App Router, API routes are implemented using Route Handlers (route.js) inside the app/api directory, enabling you to build backend logic without a separate server.
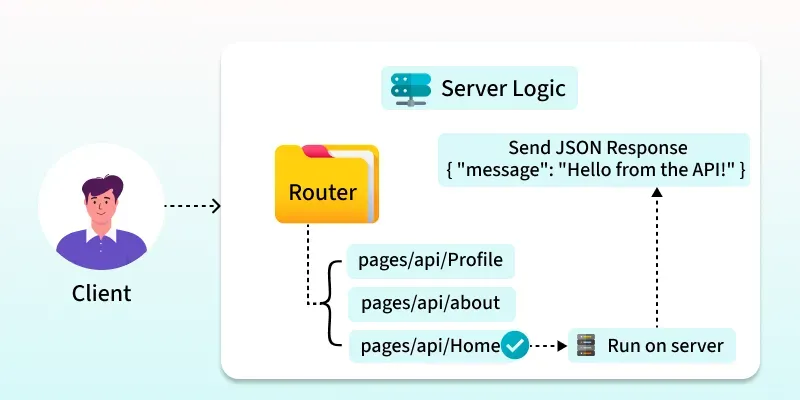
- Create server-side API endpoints using Route Handlers.
- Support HTTP methods such as GET, POST, PUT, PATCH, and DELETE.
- Return JSON responses using NextResponse.
- Ideal for authentication, database operations, and external API integration.
API Route Structure
API Routes are created inside the app/api directory. Each folder represents an API endpoint, while a route.js file handles incoming requests.
app/
└── api/
    └── hello/
        └── route.js
Handling Different HTTP Methods
Next.js Route Handlers support multiple HTTP methods within a single route.js file, allowing the same API endpoint to process different types of requests such as retrieving, creating, updating, or deleting data.
- Handle GET, POST, PUT, PATCH, and DELETE requests.
- Export a separate function for each HTTP method.
- Use a single API endpoint for multiple operations.
- Simplifies API development and improves code organization.
import { NextResponse } from "next/server";

export async function GET() {
  return NextResponse.json({
    message: "Fetching posts",
  });
}

export async function POST() {
  return NextResponse.json(
    {
      message: "Post created",
    },
    {
      status: 201,
    }
  );
}
Dynamic API Routes
Dynamic API Routes in Next.js allow a single API endpoint to handle requests with different URL parameters. They are created using square brackets ([]) in the folder name, making it easy to access and process dynamic values such as IDs or slugs.
- Capture dynamic URL parameters using square brackets ([]).
- Handle multiple resources with a single API route.
- Access route parameters through the params object.
- Ideal for user profiles, product details, and RESTful APIs.
Structure:
app/
└── api/
    └── users/
        └── [id]/
            └── route.js
Steps to Create API Routes in Next.js
Follow the steps given below:
Step 1: Create a Next.js Application
npx create-next-app@latest next-api-routes-appMove to the project directory.
cd next-api-routes-appStep 2: Project Structure
next-api-routes-app/
│
├── app/
│   └── api/
│       ├── hello/
│       │   └── route.js
│       └── users/
│           └── [id]/
│               └── route.js
├── package.json
└── ...
Step 3: Create an API Route
Create the following file:
app/api/hello/route.jsimport { NextResponse } from "next/server";
export async function GET() {
return NextResponse.json({
hello: "GeeksforGeeks",
});
}
Step 4: Create a Dynamic API Route
Create the following file:
app/api/users/[id]/route.jsimport { NextResponse } from "next/server";
export async function GET(request, { params }) {
const { id } = await params;
return NextResponse.json({
id,
name: "John Doe",
email: "john@example.com",
});
}
Step 5: Access the API Routes
Run the development server.
npm run devOpen:
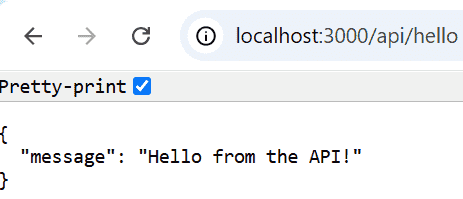
http://localhost:3000/api/helloOutput:
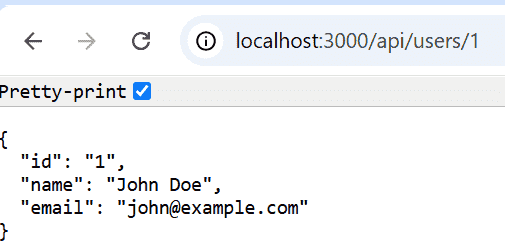
http://localhost:3000/api/users/1Output:
Accessing API Routes from a React Component
API Routes can be accessed from React components using the fetch() API or other HTTP clients such as Axios. This enables client-side components to send requests to server-side endpoints and retrieve or update data without exposing backend logic.
- Access API Routes using fetch() or Axios.
- Send HTTP requests such as GET and POST.
- Retrieve and display data in React components.
- Communicate securely with server-side APIs.
"use client";

import { useEffect, useState } from "react";

export default function Home() {
  const [data, setData] = useState(null);

  useEffect(() => {
    fetch("/api/hello")
      .then((res) => res.json())
      .then((data) => setData(data));
  }, []);

  return (
    <main>
      <h1>{data ? data.hello : "Loading..."}</h1>
    </main>
  );
}
Uses of API Routes in Next.js
Here are some uses of API Routes:
- Authentication and Authorization: Manage user login, registration, and access control.
- Database Operations: Perform CRUD operations securely on the server.
- RESTful API Development: Create API endpoints for frontend or external applications.
- Third-Party API Integration: Connect and fetch data from external services.
- Form Handling: Process form submissions and validate user input.
- Server-Side Business Logic: Execute backend logic before sending responses.