

Shadow DOM is a web standard used to create self-contained and reusable web components. It encapsulates the component’s structure and styles, preventing conflicts with the main document and other components on the page.
- Provides encapsulation for HTML, CSS, and JavaScript
- Prevents style and structure conflicts
- Helps create reusable and modular web components
Types of Shadow DOM
Shadow DOM is mainly divided into two types based on how the shadow root can be accessed using JavaScript.
1. Open Shadow DOM
In an Open Shadow DOM, the shadow root can be accessed from outside the component using JavaScript. Developers can interact with the shadow root through the shadowRoot property.
const shadowRoot = element.shadowRoot;
- Allows external JavaScript access
- Easier for debugging and automation
- Commonly used in web applications
2. Closed Shadow DOM
In a Closed Shadow DOM, the shadow root is hidden and cannot be accessed directly from outside the component.
const shadowRoot = element.attachShadow({ mode: "closed" });
- Prevents direct external access
- Provides stronger encapsulation
- More difficult to automate and debug
Shadow DOM Structure and Rendering Process
This image explains how Shadow DOM works by showing three important parts: the Document Tree, Shadow Tree, and the Flattened Tree used for rendering.
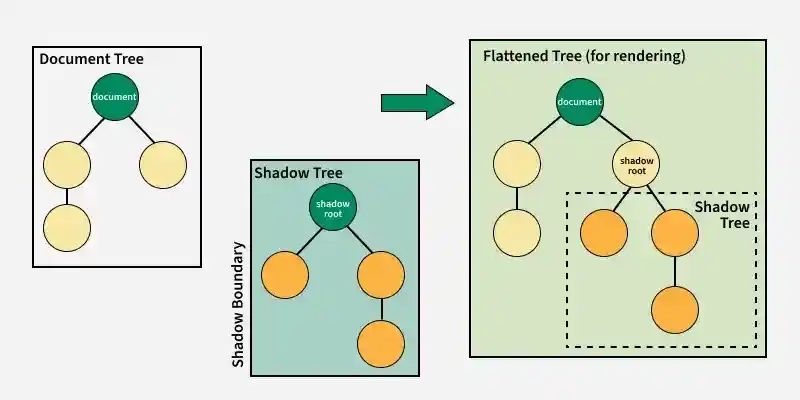
1. Document Tree (Top-Left Box)
The Document Tree represents the regular HTML DOM structure of a webpage.
- The green node at the top represents the
document, which is the root of the webpage - The yellow nodes represent standard HTML elements such as
<div>,<p>, and<button> - Selenium accesses this DOM structure by default
document.querySelector()searches within this tree- Browser DevTools displays this structure in the Elements panel
2. Shadow Boundary (Middle Divider)
The Shadow Boundary acts as a separation layer between the main DOM and the Shadow DOM.
- It enforces encapsulation and isolation of the component
- External CSS styles cannot affect Shadow DOM elements
- JavaScript outside the component cannot directly access internal elements
- Events may or may not cross the boundary depending on configuration
This boundary is the main reason Selenium cannot directly locate Shadow DOM elements without special handling.
3. Shadow Tree (Middle Box)
The Shadow Tree is a separate, self-contained DOM tree attached to a host element.
- The green node represents the shadow root, which is the entry point of the Shadow DOM
- The orange nodes represent encapsulated elements inside the component
- It maintains its own internal DOM structure and scoped styles
Key characteristics:
- Completely isolated from the main document
- Maintains independent component behavior
- Protects internal elements from external interference
Common real-world examples include:
- <video> media controls
- <input type="range"> sliders
- Custom Web Components
4. Flattened Tree (Right Box)
The Flattened Tree is the final structure created by the browser for rendering the webpage.
- During rendering, the browser merges the Document Tree and Shadow Tree by inserting the Shadow Tree at the host element’s position
- The dashed area represents the embedded Shadow DOM section
- This structure is used only for visual rendering on the screen
Although both trees appear visually merged:
- DOM APIs still treat them as separate structures
- Selenium and JavaScript must explicitly cross the Shadow Boundary to access Shadow DOM elements
Accessing Shadow DOM Elements in Selenium WebDriver
Since Shadow DOM elements are isolated from the main DOM, Selenium requires special techniques to access and automate them.
There are two common methods used to interact with Shadow DOM elements:
getShadowRoot()JavaScriptExecutor
Method 1: getShadowRoot()
The getShadowRoot() method is specifically designed for interacting with Shadow DOM elements in Selenium 4.x. It allows access to the shadow root and elements inside it.
SearchContext shadowRoot = driver.findElement(By.id("shadowHost")).getShadowRoot();
WebElement shadowElement = shadowRoot.findElement(By.cssSelector("shadowElementSelector"));
shadowElement.click();
BaseTest.java is commonly used for WebDriver initialization to improve code reusability and reduce duplication in test classes.
BaseTest.java
This class is used for WebDriver initialization and cleanup. It helps avoid code duplication and improves reusability across test classes.
package io.learn;

import org.openqa.selenium.WebDriver;
import org.openqa.selenium.chrome.ChromeDriver;
import org.testng.annotations.AfterMethod;
import org.testng.annotations.BeforeMethod;

public class BaseTest {

    protected WebDriver driver;


    // Set up the ChromeDriver
    @BeforeMethod
    public void setup() {
        // Set the path to your chromedriver executable
        System.setProperty("webdriver.chrome.driver", "C:\\Users\\change the path of the chromeDriver\\drivers\\chromedriver.exe");

        // Initialize the ChromeDriver
        driver = new ChromeDriver();

    }

    // Close the browser after each test
    @AfterMethod
    public void teardown() {
        if (driver != null) {
            driver.quit();
        }
    }
}
ShadowDOMTestsSample.java
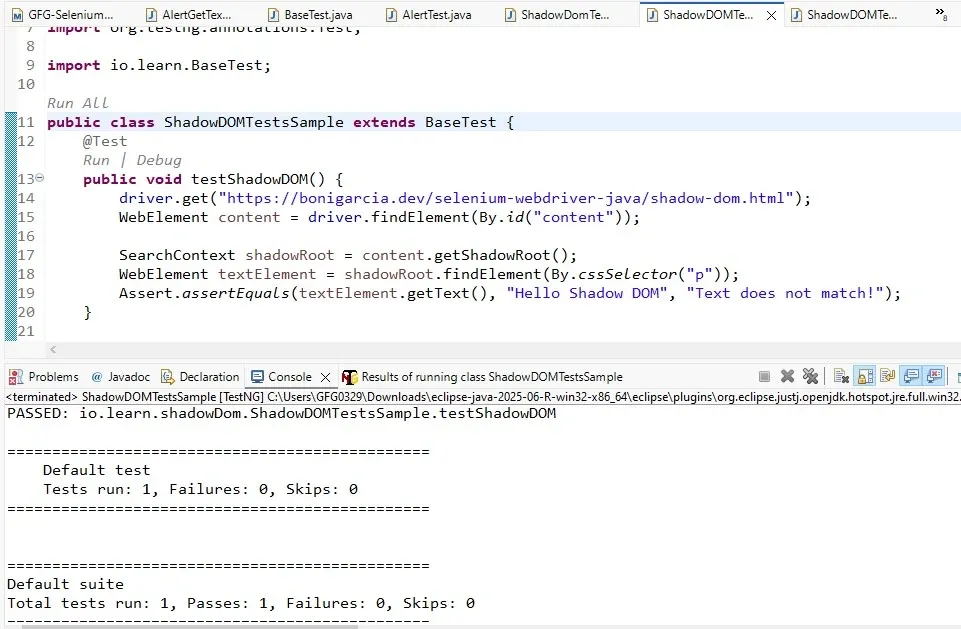
This test class demonstrates how to access elements inside the Shadow DOM using the getShadowRoot() method.
package io.learn;

import org.openqa.selenium.By;
import org.openqa.selenium.SearchContext;
import org.openqa.selenium.WebElement;
import org.testng.Assert;
import org.testng.annotations.Test;

public class ShadowDOMTestsSample extends BaseTest {
    @Test
    public void testShadowDOM() {
        driver.get("https://bonigarcia.dev/selenium-webdriver-java/shadow-dom.html");
        WebElement content = driver.findElement(By.id("content"));

        SearchContext shadowRoot = content.getShadowRoot();
        WebElement textElement = shadowRoot.findElement(By.cssSelector("p"));
        Assert.assertEquals(textElement.getText(), "Hello Shadow DOM", "Text does not match!");
    }

}
Output
Method 2: JavaScriptExecutor
Another method for interacting with Shadow DOM elements is using JavaScriptExecutor. This method allows Selenium to execute JavaScript directly in the browser to access shadow elements.
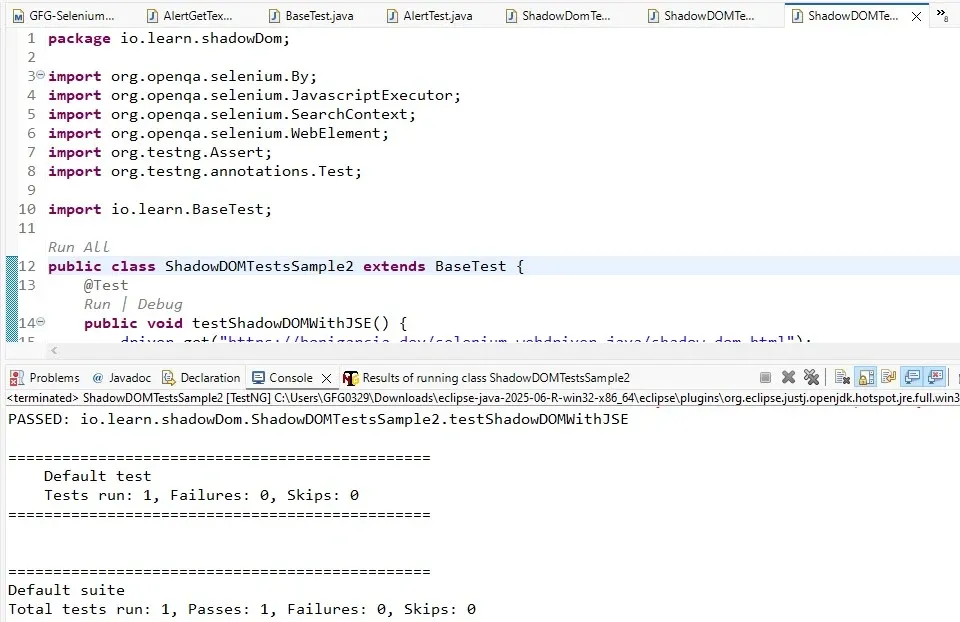
ShadowDOMTestsSample2.java
package io.learn.shadowDom;

import org.openqa.selenium.By;
import org.openqa.selenium.JavascriptExecutor;
import org.openqa.selenium.SearchContext;
import org.openqa.selenium.WebElement;
import org.testng.Assert;
import org.testng.annotations.Test;

import io.learn.BaseTest;

public class ShadowDOMTestsSample2 extends BaseTest {
    @Test
    public void testShadowDOMWithJSE() {
        driver.get("https://bonigarcia.dev/selenium-webdriver-java/shadow-dom.html");
        WebElement content = driver.findElement(By.id("content"));

        JavascriptExecutor jse = (JavascriptExecutor) driver;
        SearchContext shadowRoot = (SearchContext) jse.executeScript("return arguments[0].shadowRoot", content);
        WebElement textElement = shadowRoot.findElement(By.cssSelector("p"));
        Assert.assertEquals(textElement.getText(), "Hello Shadow DOM", "Text does not match!");
    }

}
Output
Automating Shadow DOM elements in Selenium WebDriver can be challenging because these elements are isolated from the main DOM structure. However, Selenium 4.x provides support through getShadowRoot(), and JavaScriptExecutor can also be used to access shadow elements. Understanding how to locate and handle Shadow DOM elements is essential for effective web automation testing.
Use Cases of Shadow DOM
- Custom Web Components with isolated structure and styling
- Third-party widgets such as date pickers and video players
- Independent UI sections that should not affect the main webpage
Challenges in Automating Shadow DOM
Automating Shadow DOM elements can be difficult because they are isolated from the main DOM structure. Standard automation tools and selectors cannot directly access elements inside the Shadow DOM.
- Selenium cannot directly locate shadow elements using normal locators
- Special methods or JavaScript execution are required to access Shadow DOM
- Nested Shadow DOM structures increase automation complexity
- Debugging and identifying elements become more difficult
- Dynamic web components may cause synchronization and timing issues