Jenkins provides two types of pipelines: Scripted Pipeline and Declarative Pipeline. Both are used to automate build, test, and deployment processes in CI/CD.
- Scripted Pipeline is flexible and powerful.
- Declarative Pipeline is simple and easy to manage.
- Both help automate Jenkins workflows.
Scripted Pipeline
The Scripted Pipeline is the original pipeline syntax in Jenkins, and it is based on the Groovy scripting language. It provides flexibility and control over the pipeline process. It requires a better understanding of Groovy scripting for the implementation of the complex code.
node {
    stage('Build Step') {
        // Build the application
        sh 'mvn clean install'
    }
    stage('Test Step') {
        // Run tests
        sh 'mvn test'
    }
    stage('Deploy Step') {
        // Deploy the application
        sh 'deploy.sh'
    }
}
Working:
- Build Step: Runs the build process using Maven.
- Test Step: Executes unit tests to verify the code.
- Deploy Step: Deploys the application
Use Case:
- If your pipeline requires custom logic, parallel execution, or complex error handling
- When your team is comfortable writing Groovy scripts
- If you need greater flexibility and control over execution
Declarative Pipeline
The Declarative Pipeline is a more recent addition to Jenkins and provides a more structured and simpler syntax compared to the Scripted Pipeline. The syntax uses a Domain-Specific Language (DSL) based on Groovy, designed to be intuitive and more readable. Declarative Pipelines are defined inside a pipeline block and are less verbose than Scripted Pipelines.
pipeline {
    agent any
    stages {
        stage('Build Step') {
            steps {
                // Build the application
                sh 'mvn clean install'
            }
        }
        stage('Test Step') {
            steps {
                // Run tests
                sh 'mvn test'
            }
        }
        stage('Deploy Step') {
            steps {
                // Deploy the application
                sh 'deploy.sh'
            }
        }
    }
}
Use Cases:
- If you want a simpler, more readable pipeline.
- For standard CI/CD workflows.
- When you need quick setup with minimal coding.
Jenkins Scripted vs Declarative Pipeline
| Feature | Scripted Pipeline | Declarative Pipeline |
|---|---|---|
| Definition | Written using Groovy scripting with full programming control | Written using a predefined structured syntax |
| Syntax Style | Flexible and code-based | Simple and structured |
| Complexity | More complex | Easier to learn and maintain |
| Flexibility | Highly flexible and customizable | Limited flexibility compared to Scripted |
| Readability | Less readable for beginners | More readable and user-friendly |
| Error Handling | Manual handling required | Built-in post conditions and validation |
| Pipeline Structure | No fixed structure | Follows a fixed pipeline structure |
| Recommended For | Advanced users and complex workflows | Beginners and standard CI/CD pipelines |
| Maintenance | Harder to maintain | Easier to maintain |
| Example Start | node { } | pipeline { } |
Best Practices for Jenkins Pipelines
A well-structured Jenkins pipeline improves CI/CD efficiency, scalability, and security. Below are key best practices to follow:
- Divide pipelines into clear stages such as Build, Test, and Deploy to improve readability and maintenance.
- Use parallel execution to run multiple tests or deployments simultaneously, reducing overall pipeline execution time.
- Automate testing and builds by triggering pipelines on code commits, pull requests, or scheduled jobs.
- Integrate reporting and quality tools like JUnit, TestNG, Allure Reports, and SonarQube for better visibility and code quality checks.
- Ensure security and optimize performance by storing secrets securely, implementing RBAC, using Jenkins agents, and regularly cleaning old builds and artifacts.
Real-World Example: Hybrid Pipeline for Advanced Workflows
You can combine the strengths of both Declarative and Scripted pipelines by using a Declarative pipeline as the base and adding Scripted sections for complex logic.
Example: Hybrid Pipeline
pipeline {
    agent any
    stages {
        stage('Build') {
            steps {
                echo 'Building the application...'
            }
        }
        stage('Test') {
            steps {
                script {
                    try {
                        echo 'Running tests...'
                        // Custom test logic
                    } catch (Exception e) {
                        echo "Test failed: ${e.getMessage()}"
                    }
                }
            }
        }
        stage('Deploy') {
            steps {
                echo 'Deploying the application...'
            }
        }
    }
}
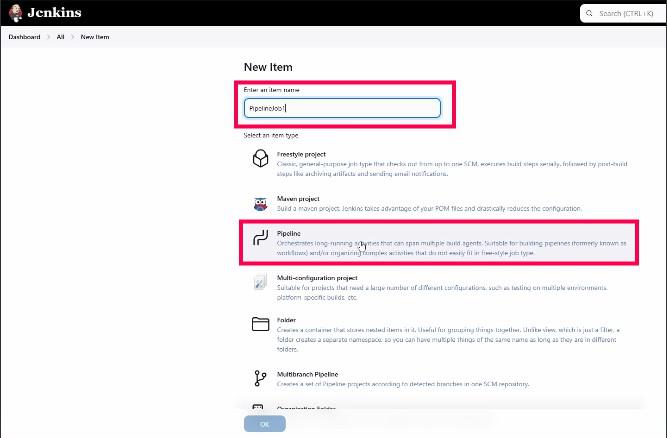
Create a pipeline job in the Jenkins
Example: 1
1. Create a project in the Jenkins which is follows:
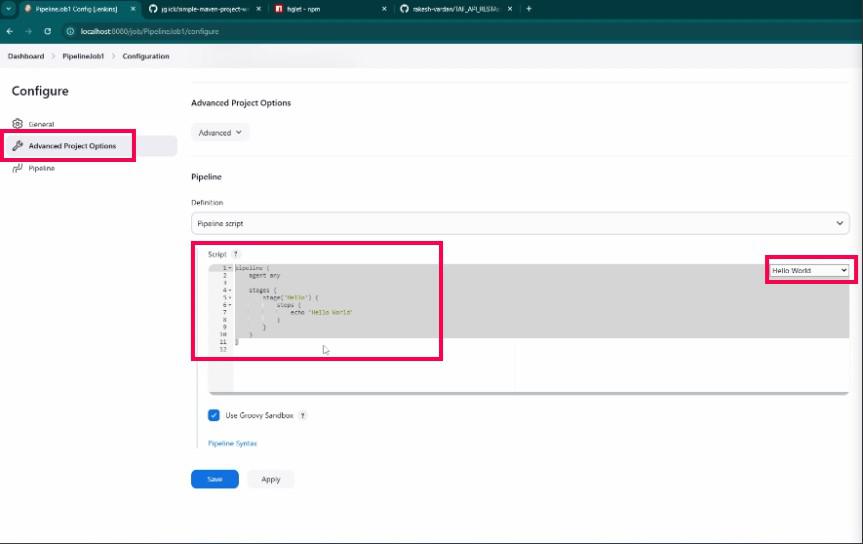
2. And in Advance project section select and add the sample project script which is :
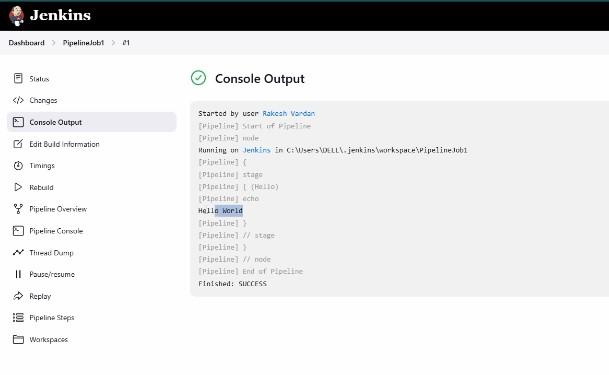
3. Click on the Build now button. open the console which is show the progress:
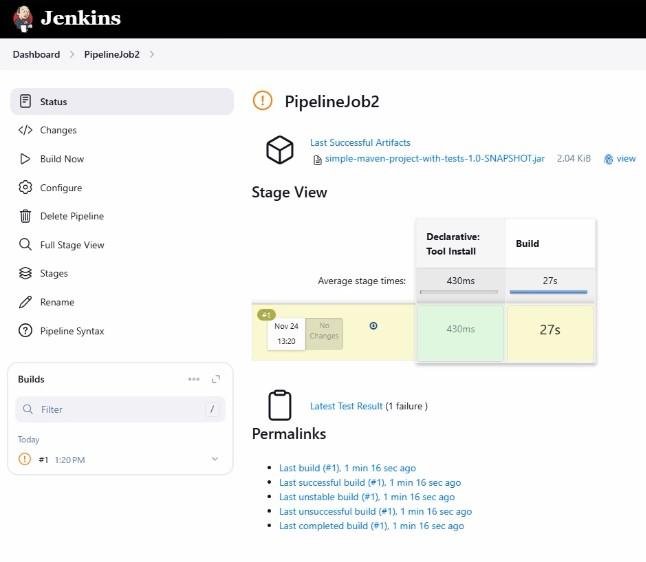
It will give the Stage view for the following sections:
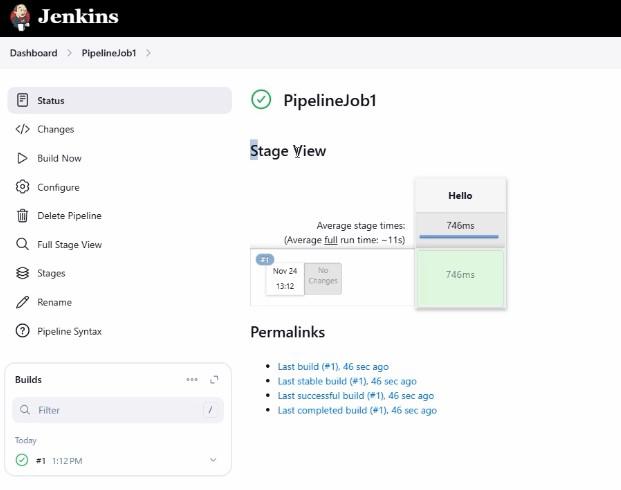
Add the another stages into the same code and check the stage view:
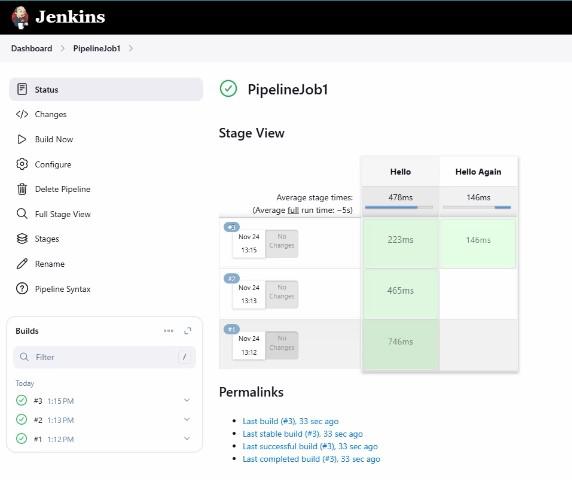
Example: 2
Lets create a another job names pipelineJob2 and use the sample code which is named as Git+ Maven:
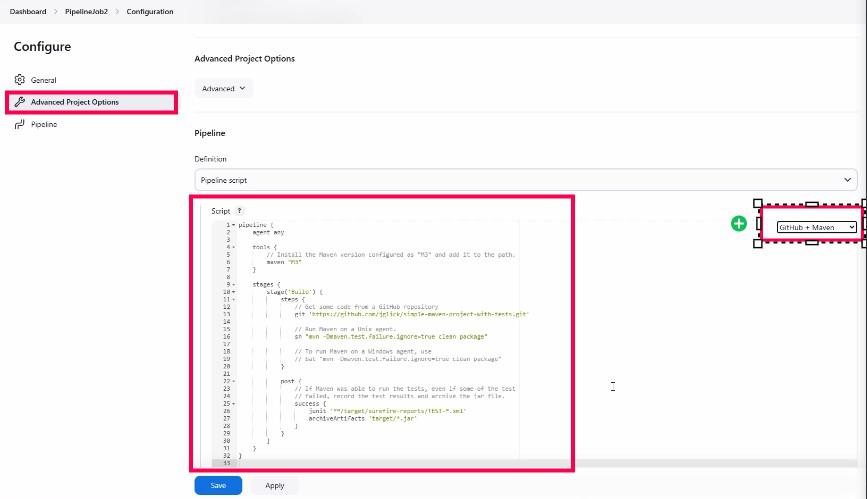
Save the Structure and click on the Build Now option for the same as we do last time and View the stage View